Pages

Showing posts with label Make-up. Show all posts

Tuesday, 12 September 2017

The Ultimate Benefit Brow In 5 Steps

There's no denying that over the years your eyebrow game has to be on top form. I remember when the craze first started and at this point, I had never touched my eyebrows with any sort of makeup before in my life, so I was so overwhelmed with all of these different products you can get to help perfect those little beauties. Although getting ready in the morning isn't as quick as what it used to be 5 years ago, I just don't want to even think about what I would look like at an event eyebrow-less. I have tried numerous brands but I just love my little Benefit collection and with 5 easy steps to create a strong brow, whats not to love!

1. Clean Those Beauties
Yes, clean! Theres nothing worse than trying to create a masterpiece if you can't start with a blank canvas. I always have a little cotton bud near me when applying make up because I can be so dopey, which comes in handy when cleaning my eyebrows. All you need is a little bit of makeup remover on the end of your cotton bud and softly wipe over your eyebrows, picking up any product that might have clung to those hairs. It doesn't matter if you accidentally wipe away some of your foundation around your brows, as you can either carefully cover or, highlight!

2. Condition
You prime your face before applying foundation, so why not prime the area that requires a lot of time to perfect? The Benefit Conditioning Primer is enriched with Keratin and Soy Protein which helps you to nail your brow game. You can create fuller and healthier looking brows in just one twist, and it also helps to stop them from looking wild. The gel formula allows your brow to stay in shape which makes life so much more easier when shaping, as the shape is pretty much there already!

3. Get That Killer Shape
Even with a pencil, I always need to have an eyebrow brush to blend and then brush through. I have recently just bought this Benefit Goof Proof Brow Pencil as I had heard so many great reviews from it. I usually go for quite a thin pencil but this one is a little thicker, covering a lot more once you've nailed that shape, and its waterproof! Which is perfect for when those dark clouds start to form. Theres no worrying about this product drying up or becoming blunt, the only thing you have to focus on is keeping within those lines! Once you've created an out line, I always push the product up starting inwards to help blend, you want them to look as natural as possible which means no harsh lines! Once everything is blended and you're happy with the outcome, use the brush on the end of the brow pencil (or your own) to just brush them into shape.

4. Set With Volume
I adore Benefit Gimme Brow, It just adds the extra oomph and kills the feeling of anything missing. This eyebrow gel has a volumising micro-fibre enriched formula which defines, tints and creates the illusion of thicker brows. Perfect! It also sets those little wandering hairs into place, and with it being long-wearing, you don't have to worry about them for the rest of the day. On those busy days where make up requires time that you don't have, I just apply this product and go! 

5. Highlight
I count my blessings everyday that highlighter exists, its so pretty and brightens up your face on even the darkest of days! I simply apply the Benefit High Brow Highlighter to my brown bone and the arch of my brow and blend, sharpening up my brows making them look clean and crisp with a glow effect.
After looking at the Benefit eyebrow counter for hours wanting to buy the whole shebang, these have to be my all time favourites, and definitely an essential! These simple steps are so easy, but make a huge difference to your routine.

Whats your favourite brow products?

Love,
Chloé Danielle-Taylor

Tuesday, 5 September 2017

Urban Decay Naked Heat Palette


Usually, a new Urban Decay Naked Palette means a special trip to HoF just to purchase it, so I don't know why I'm so late to jump on the bandwagon with this one. I have had so many special occasions recently and with the weather shinning away like it has been, I couldn't resist finally adding this one to the collection.

The colours are everything that I could ever ask for in a palette right now as I just can't help but reach for the red-brown/ burnt oranges at the moment when it comes to my eyes. You dress depending on the weather, which includes your make-up. But although we are slowly waving goodbye to summer, these colours will definitely be a staple in the following months to come.

Firstly, I have to point out how Urban Decay kills it every time. I love eyeshadow palettes that can cater for both day and night, whilst still being able to mix things up and create different looks and with this range, with 12 beautiful colours to pick from, this definitely does just that.


Its got a perfect combination of matte and shimmery tones to create the look that you're going for, and the pigmentation of this product will never disappoint. Just one swipe of your desired shade and it will add such power to your eyes, blending so easily and creating the perfect crease. And when its packaged so beautifully and theres thought and detail not just in the colours but the completed look, whats not to love?!

We are all still learning and getting to know ourselves, and one thing that I have learned is that my eyes just don't suit bold, electric eye shadow. I think its something to do with the shape of my eyes, maybe they're too round, I dunno, but it just doesn't suit me at all and I just look ridiculous. Which is kind of heart breaking as I follow so many MUA's and they're absolutely on fire at the moment with what they're creating when it comes to your eyes. But because this product is so pigmented - no complaints - its best to start off with only a little on your brush and then to build, especially when it comes to more of the red tones.


When reviewing, I don't try and find a fault but I want to be as honest as I can and if there is something that I personally find could have been better, I would say it but... I actually can't fault this product. It stays on throughout all of my antics and day to day activities if I have to get all dressy, and it gives me such a leeway of what sort of colour to focus on, whether it is the red or if its more of the brownish tones. Either way, this is definitely my go to eyeshadow right now and I can't wait to play around with it more for when the Autumn arrives.

Whats your favourite eyeshadow? Have you tried the Urban Decay Heat Palette yet?

Love,
Chloé Danielle-Taylor


Thursday, 24 August 2017

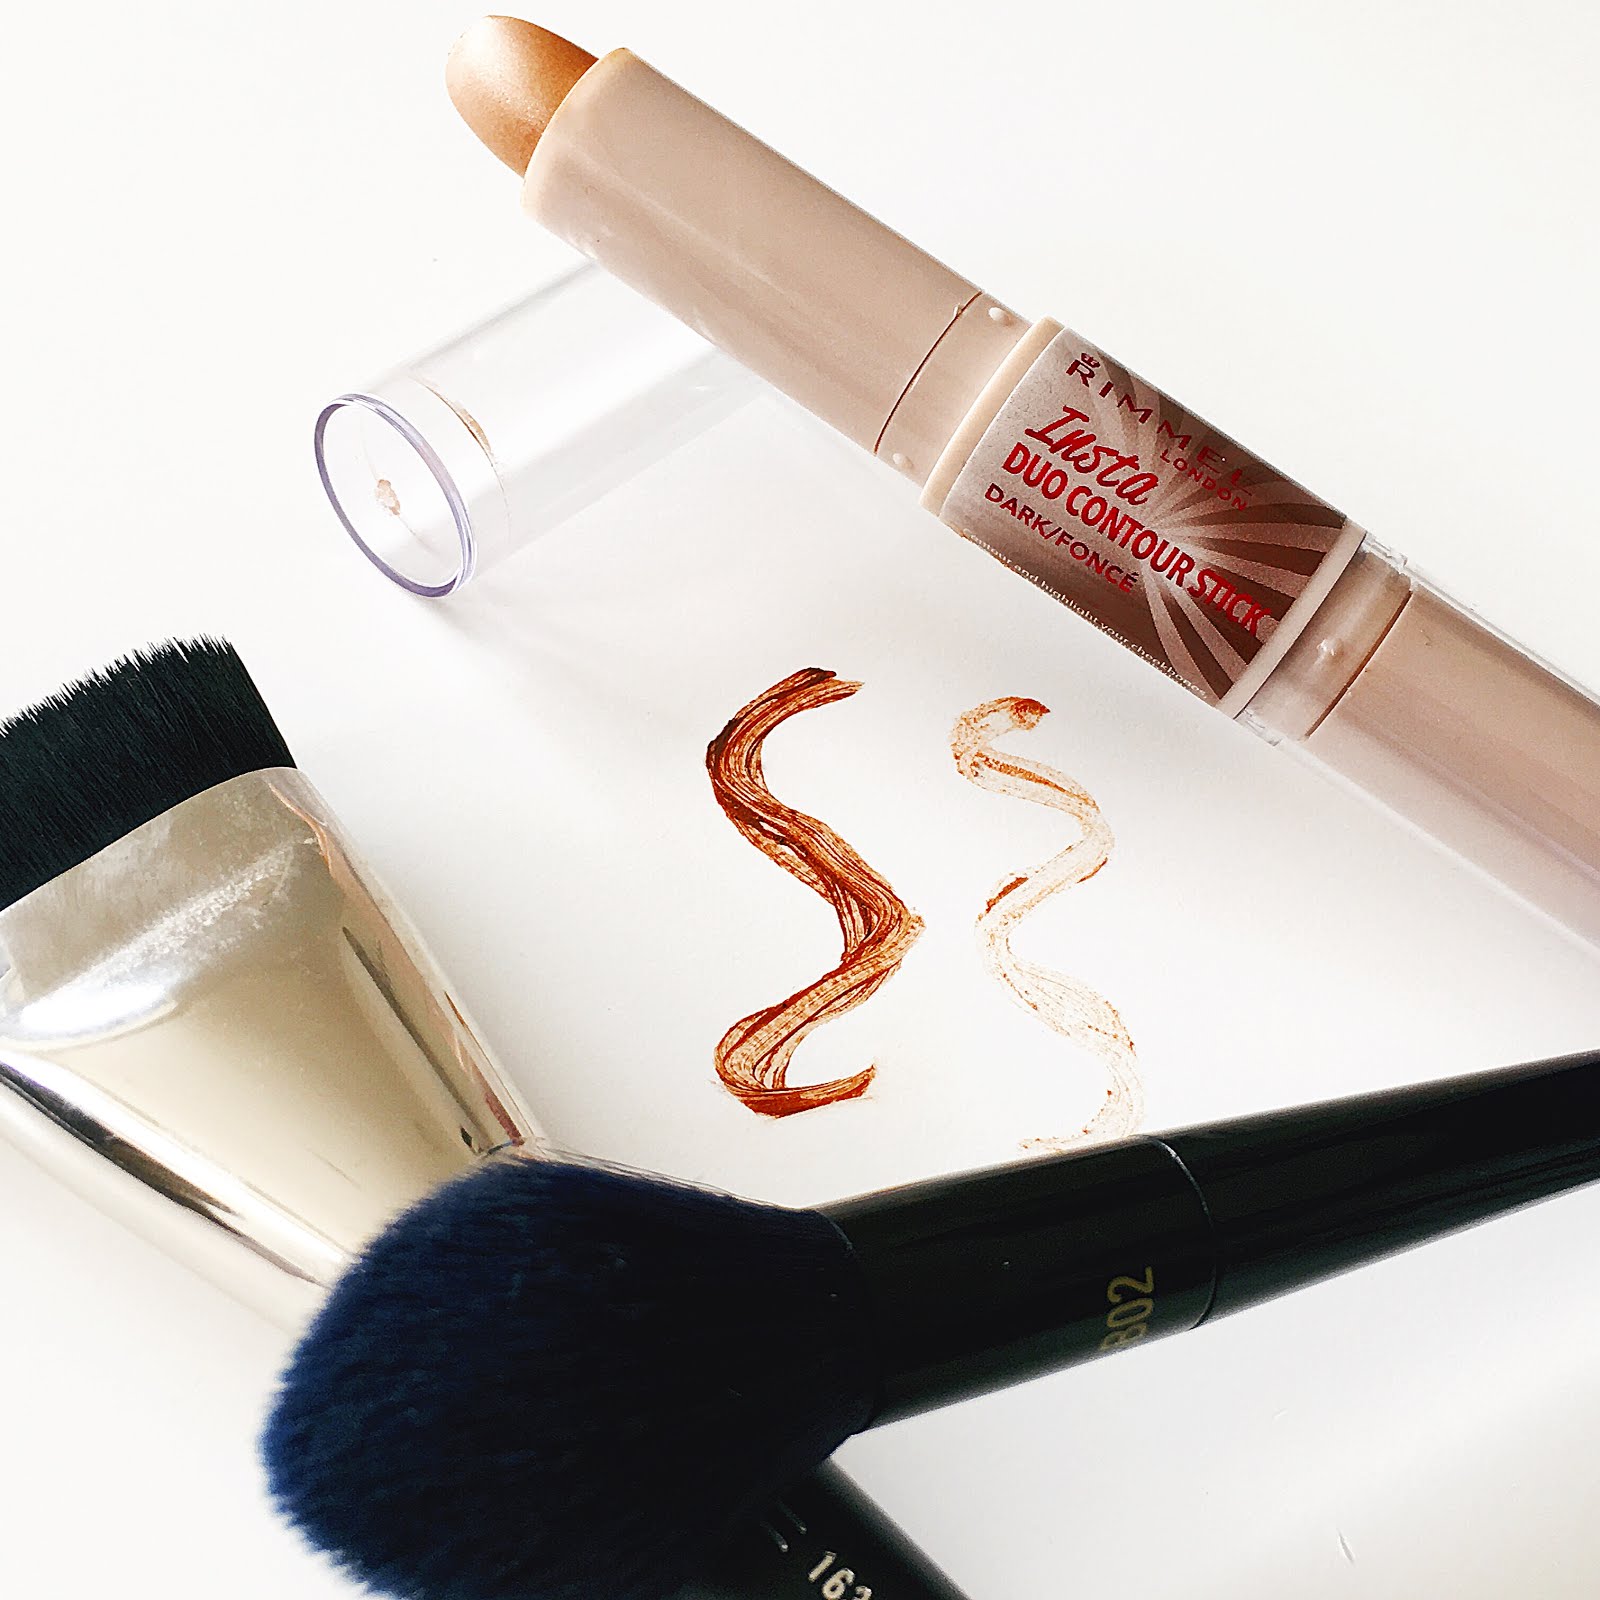
Rimmel Duo Contour Stick | My Go To Fresh Faced Look

Recently I'v been starting to put a hold on applying a full face of make up on those days where, lets be serious, are a little more lazier than others. Or if you know that you're going to be super super busy and your face is just going to fall off before you even have time to sit down for lunch. I still try and look at least half presentable just in case I do see somebody that I know but, its London, the odds of crossing paths with someone is zero to none.


All of this started when I started getting little breakouts, but if I'm completely honest, that was mostly due to my fingers not being able to stay away from the sweet isle. So I decided to ditch the foundations and the mountain of products and stick with 'Less is Best'.

Im lucky in the sense that my mum is a huge fan of beauty products and she's constantly reading reviews and watching vlogs so she's kind of like my eyes and ears out there. She introduced me to the Rimmel Duo Contour Stick which is exactly what I need right now. I've got the shade 'Dark' just so I could pull off trying to look as though I've put more effort in and also so that I'm a little more defined.


After my morning routine and my moisturiser has had time to set into my skin, I lightly add concealer to any unwanted red area's or, if you've read my post about Dark Circles, around my eyes. I then get straight into applying this Rimmel product, applying it around my hair line and also just under my cheek bones. To blend I use Mac 163, but trust me a little goes a long long way, so you really only need a light layer and to barely press this product. How beautiful is the colour for the highlight by the way?

There are three colours to chose from when it comes to the contour, and the other reason that drew me more towards 'Dark' is the fact that I have recently been away and I'm off again to Mexico in a few weeks, so I wanted something that I could keep on using. And just like any other product, the more you blend, the more it fades.


Once the contour is nicely blended and I'm happy with how it looks, I move on to applying the highlighter to my cheekbones, the bridge of my nose and also my cupid bow. It is very subtle so if you're looking for more of a popping look, this highlighter probably wouldn't be the best option. But it does help to give you a very refreshing look and brightens up your face. If its a bit too subtle for you, or if you're having one of those days where you feel tired, you could always apply some to your brow bone and the inner corners of your eye just to help make them a bit bolder. I always blend with a fan brush but with this texture I use a Real Techniques B02 brush. Add some mascara and your go to lipstick and you're done! I've finished really long days and I can see that its only faced a little, naturally, so its definitely the product that I keep on reaching out for right now. And for only £6.99, who wouldn't want this handy cream contour?!


Whats your favourite go to products right now?

                                                                       Love,                                                                                         
Chloé Danielle-Taylor 

6 Essentials For The Cold Upcoming Months

I know, Summer coming to an end is the last thing that anybody wants to think about. We daydream all day long for months and months about...